Saturday 9 June 2012

Delft Clay, Sand Casting

I want to brag share this with you. Here is my 13 year old baby's last year's school photo project. The project required him to make hand made medieval artifact. Not thinking very long, he decided to use the materials he had at hand, and he had 3 oz of pure silver and a Delft Clay Sand Casting set. What else could be found in (at the time) a small jewelry workshop?

On the project he got an A+.
At first he made a model of his personal coin, with his proud face and inscription on the back, and his favorite symbol on the other side. Some delft clay was prepared and everything readied for the casting.


A blowtorch was readied, and an awesome face was practiced before-hand. :)


And this is my favorite photo. I love to photograph melting metal . :)


The casting went successively, and the coin was cleaned from bits of burned clay. By the way, I do not suggest preforming a delft clay casting without some good ventilation. Do you remember the smell that always accompanies trains? Well the same smell of burning oil, earth, and coal will be absorbed by the walls. And after a few castings without good ventilation, the room would probably smell like a train depot.


 The excess metal is removed.


And now the most annoying and consuming part : the finishing of the coin. When it comes to wasting metal, and time, Delft Clay, or Sand Casting, takes the cake, (except for maybe sculpting something out of a piece of silver).


My Son chose a very difficult model for casting, because it was two sided,  it was very hard to cast it without damaging the coin. Before attempting tho make the coin, he first planned out where the air vents, and the metal funnel was going to be located. The weight is 79 grams of pure silver. He did the entire project all on his own, and I only helped take photos, and poured the silver into the mold, because holding the torch, and pouring the metal at the same time, is quite hard.


And now my "baby" is professionally melting metal, knows the different stages of readiness of silver, can tell apart pure silver and un-pure silver by it's behavior during the melting. I'm so proud! :) 

Sunday 3 June 2012

Silver Refining. Part 3

The participants of the third part are: a power source (in our case this wonderful pro-plater, basically an ordinary powerful power source), half of a 2L pop bottle, a tea filter (a coffee filter will also work, but as tea filter is more comfortable to use), a stainless steel fork, some insulating tape, a brass rod, and a thermo-shrink pipe (Its missing on the photo, but will soon appear :) ). The hero of last time's epic tale, the silver ingot, is gone, but instead, we replaced it with a silver blob. We thought it would be a more comfortable fit for a not-so-deep container.


We take a strip of pure silver, and weld it to the blob . We bend the end of the strip for better hangability.


Now we make two wonders of modern innovation. A cathode electrode made using the help of a fork, insulation tape, and some pliers and an anode stick, made by putting the thermo-shrink pipe on the brass rod. The pipes are cut, keeping in mind the distance in the center, and to the side, the center being where the blob is going to hang, and the end is where an alligator clip is going to be attached.


 This is how the complete piece looks. An electrolytic bath, in the pop bottle variant :) .
Attach the tea filter to the anode stick and hang the blob in the middle, and then check the conductivity between the rod and the blob.


This chemical jar contains the very first dose of silver nitrate, form the first part (32 gram of silver/80 grams of diluted nitric acid). We dilute the mixture with distilled water till we have 1L.


We submerge the cathode-fork into the electrolytic bath, and pour the silver nitrate in. We make sure that the silver nitrate doesn't touch the joint between the strip and the blob. The worst case scenario, the joint gets diluted, the blob falls down, and the reaction stops.


 We attach the minus electrode to the fork, the plus to the brass rod, and turn on the electricity. In the process we make sure that the voltage is between 4-8 volts, and the current doesn't surpass 5 amps. 


Right before your eyes, silver crystals start to grow. It is necessary to make sure that it doesn't grow to reach the tea filter, so that a short-circuit doesn't occur. Some people say that the reaction or growth of the crystals, goes 8 grams/amp , but in reality it goes slower, because part of the current goes to waste. The reaction is accompanied by an excretion of warmth, the blob dissolves, and crystals grow at the bottom of the electrolytic bath. The tea filter acts as a filter (obviously) for all the junk and slime, produced by the dissolving blob. 


When the reaction ends and the blob dissolves, we take apart the electrolytic bath, pour the silver nitrate into the chemical jar until the next use, rinse the newly born silver crystals in water a few times, then we filter and dry them. 


 After that we melt the silver and preform a normal water casting to acquire small sliver bits for any future projects. This silver that you see is .999 (pure) silver. We can now let out a sigh of relief, because there was a bit of fear while the silver was in a liquid state, because we could not touch it or see it.   :)


The calculation shows that we received around 473 grams of the 500 that was in the impure silver.


After diluting the silver in nitric acid, there are still some rouge fragments. The acid didn't dilute them and their make-up is unknown. :)


Until next time. :)

Thursday 17 May 2012

Silver Refining. Part 2

Our next step is aquiring silver cement.
We will materialise the silver from the silver nitrate, with copper.
Cu+2AgNO3-->2Ag+Cu(NO3)2
We take the silver nitrate which we made in Part 1 (note, the bluer the silver nitrate, the more copper it contains, so the lighter it is, the better) and then add in some copper. As a source of copper, we take old copper pipes, and reuse them. Before use, we clean them till they shine, no solder allowed.


After adding in the copper, the reaction goes rather quickly, as a result of the reaction, it heats up,  further increasing the rate at which the reaction goes. This photo shows what happens to the copper, a few minutes after it gets put in the silver nitrate.


Silver cement starts to materialise on the copper pipes after a minute. This is silver, in a powder-like state. The pipes act as a source of copper, and feed the silver nitrate and the remanents of the acid, deacreasing them gradualy, till they fully dissapear. To keep up the pace of the process, we brush the materialized silver back into the mixture.


If your pipes have been fully dissolved, just get more. With the extraction of the silver from the silver nitrate, the reaction slows down, and thus the container can be left to stand for a day or 2. You only need to make sure that there's still copper in the jar, and so that no foreign objects get into the mixture. When you see that the process has come to a halt, which when stopped, will be cold with no signs of a reaction, with blue liquid at the top, and a layer of silver cement at the bottom, you can begin filtering the silver cement. On the photo, the process is incomplete, as there is still little particles of silver floating around in the blue mixture.


We start the filtration. We will need a funnel, some coffee filters, and a jar, where the liquid is going to go. 


After we have filtered the cement the first time, we repeat the process with water, until the water coming out of the filter is clear, and you have washed out the remnants of the copper nitrate from the silver cement. After the filtration of the cement is complete, the excess moisture has to evaporate, either through natural means, or assisted means.


In the mixture left after the filtration, silver is still present. Since we are greedy economical people, and also for scientific purposes, we will try to extract more silver from it later. We add in some table salt, and leave it for a while, so that the silver chloride settles to the bottom of the mixture.


 After the cement drys, we melt it in an old melting crucible, and since the cement still has some contamination left, this crucible will not be used for any further work with non-contaminated silver. Since this is silver cement, you have to melt it equally and slowly, because if you rush, silver dust particles will out of the crucible.


Without any complications, we simply pour the melted silver into water, and thus acquiring silver material for future work.


 I'll explain why we don't just melt it into an ingot right away. 
This silver is not the end product, and isn't pure .999 silver, but still contains faults, and is around .980 in purity. We still need to melt it into an ingot, for electrolysis. It is more effective to first make silver bits first, to later take the required amount to make an ingot. The photo displays an ingot made with the first fruits of our success. This is only 150 grams of the 2 pounds of contaminated silver. The rest is undergoing the same process.


The second part is completed successfully, boringly, and with a lot of knowledge acquired. :)

Wednesday 16 May 2012

Silver Refining. Part 1

A small review of the previous post :)
I have come across a problem. The silver got contaminated.
 Right in front of your eyes, I will be de-materializing  2 pounds of .925 Sterling silver, with the presence of staples from a stapler, and regaining pure silver.
Lets do this. :)

The process will be made up of 3 individual parts.
1. Dissolving the .925 silver in Nitric acid.
2. Cementing the powdered silver particles, and melting them into ingots.
3. Refining and receiving .999 silver through electrolysis.

Part 1, Day, 1
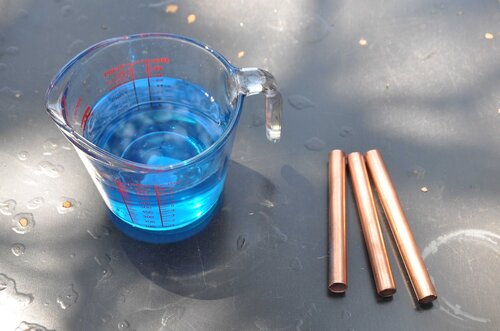
The starring actors of the first stage are: Nitric acid 68.8%, deionized water, a glass container, and a stick of quartz.


Not knowing the advanced concepts of chemistry, I had to take my husband as an apprentice ;) And this wise decision saved me my hands, camera, and everything that could have been destroyed by concentrated acids.

ATTENTION!: At all times during work done with acids we have to remember 3 things:
1. Always work in well ventilated areas, or outdoors.
2. You must wear gloves, and safety glasses.
3. The acid gets poured into the water, not the other way around.

The first step is to get diluted Nitric acid, needed for the Parts 1, and 3.
We do this by taking 500 grams (NOT millilitres) of deionized water...


And adding in 500 grams of Nitric acid.


This way, we divide the concentration of the 68.8% Nitric acid, by 2. We do this to simplify the chemical reaction and, to decrease the safety hazard. It is not recommended to use tap water because it contains chlorine, which can produce silver chloride. You can also receive pure silver from silver chloride, but that is another process all together. 


One kilogram of diluted Nitric acid, takes up around 850 ml. We mix the diluted acid with the stick of quartz.


While the apprentice is pouring the acid into special jars made for storing chemicals, the master can immerse herself into the beauty of nature.  :)


Based on calculations, we figured out that, we will need silver nitrate with a concentration of minimum 20 grams/litre, to make an electrolyte, which will be used in the 3rd part. We decided to increase the concentration of the silver nitrate to 50 grams/litre, for which we needed to dissolve 32 grams of silver in approximately 80 grams of the diluted acid that we acquired in the previous step.


And after, starts the hardest step, Waiting. The process of the dissolving has started. And now we wait.


The acid is very corrosive, so be careful. A little drop got onto a stone tile, and triggered a ferocious reaction.


The process was accompanied by the excretion of a brown gas, and the blue colouring of  the solution. We're still waiting.


We got tired of waiting, and my apprentice took a culinary break. But the Master, in her awesome skill, could resist drooling all over the barbecue, and actually took a photo of the meat. :)


In half a day, the process came to a halt, and the acquired blue liquid, also got transferred into a special chemical jar, to await the third part. 


Part 1. Day 2.
Amazed at the success of yesterday's work, we diluted the 2 pounds of contaminated silver into the diluted Nitric acid from yesterday, keeping in mind that for every 32 grams of silver, we need 80 grams of acid. This is an approximate number, but it works well for us. 


On the photo you can see an ugly pickle jar, filled with blue, murky liquid. But the price of the contents, make this ugly jar, the murky blue liquid, the brownish coloured glass from the reaction, and the stains on the jar, rather appealing, because in this jar, is 2 pounds of diluted silver. :)


 Part one is concluded, successfully, deliciously, and with some interaction with nature. :)

Friday 4 May 2012

We have moved!


Finally it happened… Not only is jewelry my hobby, but now I also have a huge workshop! Well not exactly huge, but sufficiently big for all the equipment, instruments, and whatnot. It also has enough room for 4 people to work in without constantly having to bump into each other, and most importantly, its separated from the other rooms, unlike before, where the worktable was located in the living room.

Speaking of other rooms…  Before the last trip, I forgot to put the silver into a separate box, and left the unfinished project on the table. When we came back, right before we moved, we melted around 2 and a half pounds of silver, for later use in the new workshop. But later on, I caught grandma trying to put little metallic objects into the box filled with silver, claiming that, everything that looks like metal in our house has to be silver, and in the end we had quite a bit of staples in the box.

We make jewelry using silver acquired form the bank, mixed with a calculated amount of “S-88” which is an anti-allergenic alloy, to get 925 sterling silver. We check the purity of the leftovers from previous projects, put them into the box of silver, and for the next melting, we take part of the leftovers form the box, add in some new silver form the bank, and the S-88 alloy. That way we always have good quality silver, and make sure that there’s no waste.

When we moved here, first we put up the rolling mill, rolled a strip of silver from the last melting, and guess what we found? That’s right, staples from a stapler, melted into the silver.


 And now 2.5 pounds of silver from the last melting will have to be refined. Just under half a pound of silver was contaminated, but I can’t risk the metal getting contaminated further, and thus, I have to refine the entire 2.5 pounds. Since I like huge projects, refining 2.5 pounds of silver will be lots of fun.
We could’ve sent the silver for purification to a refinery, but we love experiencing new things, and thus, refining the silver will be my next photo display, so make sure to buy some popcorn. :)